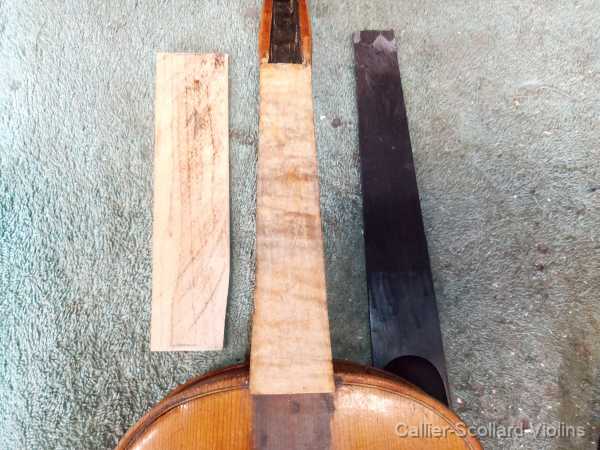
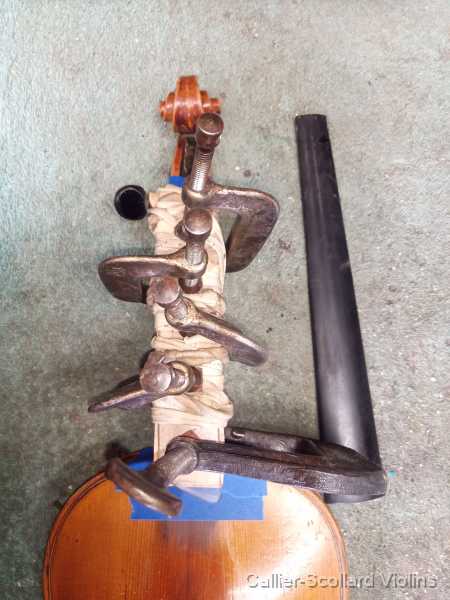
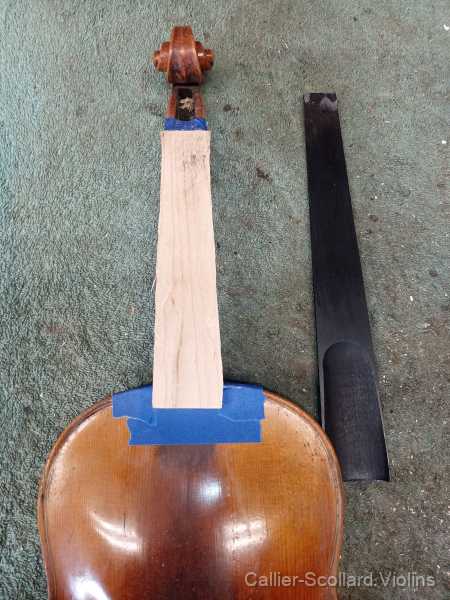
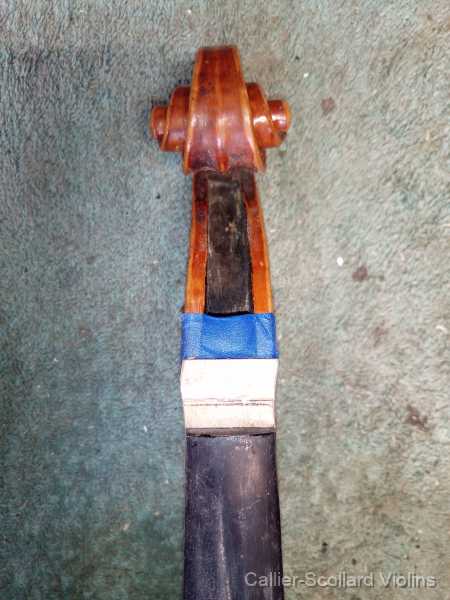
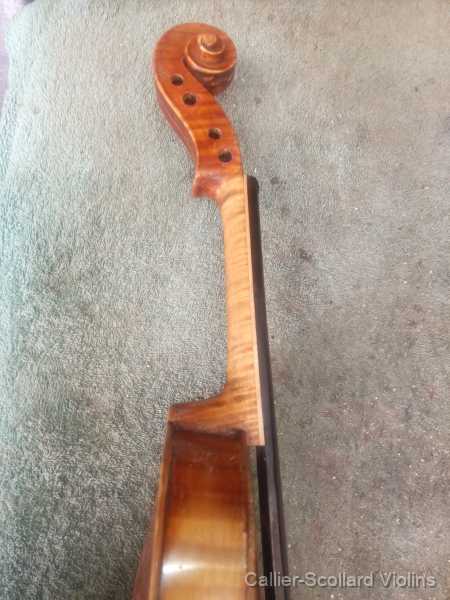
This violin had a relatively high arch, and the fingerboard projection at the bridge needed to be raised without significantly changing the neck angle. Rather than resetting the neck, I decided to install a tapered maple wedge between the neck and fingerboard. After removing the fingerboard and nut, I cut a maple wedge using a table saw and tapering jig, then carefully fitted and glued it to the neck. With the fingerboard temporarily held in position, I gradually planed the wedge until the desired projection height and angle were achieved. The fingerboard was then fitted and glued with hot hide glue, and the excess maple was trimmed away. Finally, the neck was reshaped and smoothed for comfortable playing, the nut was reinstalled, and a new bridge was fitted to the corrected fingerboard projection. - Measure the Projection: Measure the existing fingerboard projection height at the bridge to determine how much correction is needed.
- Plan the Correction: Because this violin has a relatively high arch, I wanted to raise the fingerboard projection without significantly changing the neck angle. A tapered maple wedge would provide the necessary adjustment.
- Remove the Fingerboard: Carefully remove the fingerboard and nut to prepare the neck for fitting the wedge.
- Cut the Maple Wedge: Use a table saw and tapering jig to cut a maple wedge slightly larger than needed for the final adjustment.
- Determine the Planing Direction: Examine the grain of the maple and determine the best direction for planing, working from the body toward the scroll in this case.
- Fit the Wedge: True up the neck surface and carefully fit the maple wedge, leaving extra material extending toward the scroll and over the body for final trimming.
- Glue the Wedge: Glue the fitted maple wedge securely to the neck and allow the glue to cure.
- Check the Projection: Hold the fingerboard against the wedge and measure the projected height at the bridge to determine how much additional material needs to be removed.
- Adjust the Wedge: Gradually plane the wedge, repeatedly checking the fingerboard position until the desired projection height and angle are achieved.
- True the Gluing Surfaces: Carefully true up the upper surface of the wedge and the underside of the fingerboard to ensure a close, even fit.
- Check the Nut Position: At this stage, the wedge also provides an opportunity to make a small correction to the position of the nut if needed.
- Trim the Wedge Ends: Remove the excess maple extending beyond the nut position and over the body.
- Reglue the Fingerboard: Glue the fingerboard securely to the maple wedge using hot hide glue, carefully maintaining the corrected alignment.
- Trim the Excess Maple: Allow the glue to cure overnight, then carefully trim away the remaining excess wedge material along the sides of the neck.
- Shape the Neck: Blend the maple wedge into the original neck, carefully shaping the entire neck so it feels comfortable and natural in the player's hand.
- Wet and Smooth the Neck: Lightly wet the shaped neck to raise the wood grain, allow it to dry overnight, then smooth the surface again. Repeat the process as needed until the surface remains smooth.
- Reglue the Nut: Fit and securely reglue the nut in its proper position.
- Fit a New Bridge: Fit a new bridge to accommodate the corrected fingerboard projection and complete the setup.
 IMG 20261023 104849 609 | IMG 20261024 131555 004 | IMG 20261026 102856 925 | IMG 20261027 120951 004 | IMG 20261029 130655 353 | |
Note: For instruments with a higher arch, I generally prefer a fingerboard projection height of approximately 29 mm at the bridge. Once the neck has been shaped and finished, I do a little varnish touch-up around the scroll and neck heel. I also treat the maple wedge and original neck to give them a uniform appearance, adding simulated flame to the wedge so it blends with the surrounding maple. Unfortunately, as usual, I neglected to take photographs of the finished repair. |